The robot's objectives are the following:
1. Follow a line with sharp turns
2. Maneuver through breaks in the line
3. Detect obstacles and manuever around them
4. Identify colors to be able to locate green and aluminum victims.
VIDEOS OF THE ROBOT IN ACTION
GOAL: This robot will be
built to compete in the 2008 Robocup Junior Rescue competition. In this
competition the robot must " follow a black line which twists and turns ,
avoid obstacles present on the line , and identify green and aluminum
tape victims with a flashing lamp". The robot itself will have three
main functions making it a 3 in 1 robot .
Lets begin the long process of researching , designing , building, and programming the robot.
Note: Quite a few people have told me that they would probably do only
part of this tutorial , and not the entire project. Therefore , I have
divided each "part" of the tutorial with its own parts needed list. A I
hope you learn something from this tutorial!
The Bill of Materials and Hours Spent can be found here :
Research:
After many , many hours of research I decided upon making a
prototype version , which would allow me to test out the different
concepts which I will need to master before finishing this robot.
I broke down the robot into 5 subsytems: Locomotion , Power , Sensors , Control, and Display.
- Locomotion - I will use two HS-42BB servos for locomotion and one ball caster
- Power - four AA batteries will provide the power for all the systems
- Sensors - five QRB1113 reflective
object sensors will track the line , one scanning PING ultrasonic sensor
will provide ranging, and one photoresistor /LED will search for
victims.
- Control - One PIC 16F616 microcontroller will act as the brains for the robot . It will be programmed in PICBASIC and assembly
- Display - one LCD display will show
what routine is being done , one LED will show power , and one LED will
flash when a victim is detected.
Summary of Robot Procedure
- First the robot will check the sonar rangefinder.
- If there is an object or wall is detected , then the object avoid maneuver takes place ( we'll deal with that later ) .
- Next it checks the color sensor.
- If the color sensor sees a victim ( green or aluminum tape) then it will flash a light.
- Next it checks the line sensors
We'll call the three middle sensors Left, Center , and Right. The top
left will be LLeft and the top right will be RRight. The top middle
sensor, which happens to also be the color sensor will be Color.
- So the robot wil check the
LLeft and RRight for the black line. If one of them see it, then the
robot will go forward until it does not see the line anymore and then
turn in the direction of where the line was( e.g. RRight sees it, then
go forward until no sensors see line and then turn Right until you
recapture the lien with any of the sensors) .Then it will retake the
line that way.
- If the Right sensor sees it( the middle right) then it will make a slight right turn until Center sees it.
- For left it will make a slight left turn.
- If the line is seen by either the color sensor of the center sensor then then the robot will merely go forward.
- If no sensors detect anything , then it is a break in the line and it'll go forward.
- Now the program will do a loop
I made a quick CAD of what my final product should resemble.
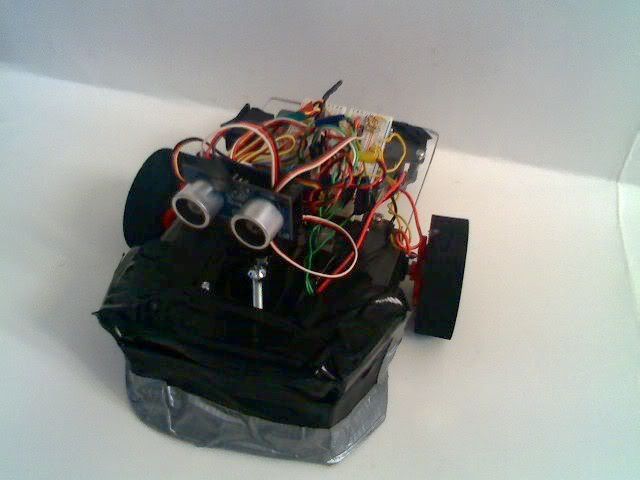
After ordering all these parts from various online stores, i put
together the first version of my line following robot. The assembling of
this version is unimportant , as it was just a testing platform.
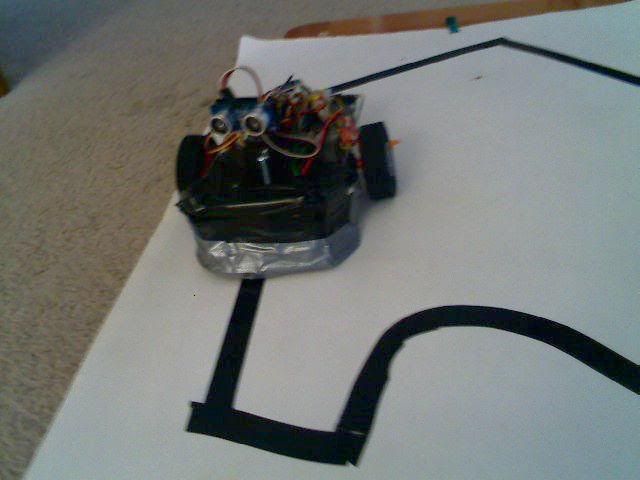
 now the good version 
Here's a quick video of it. As you can see , it is unable to handle
sharp turns and is relatively slow. Also note the crude design and the
hotglue everywhere. The completed , plexiglass version of this robot
will be faster and more sophisticated.
Designing:
Here is the list of things which I learned from the prototype version of the robot.
- The proper sensor array is two in front at the corners and three in the middle
- Hot gluing is VERY bad for mounting components! I now only use
hotglue to reinforce soldering joints and heat shrink, never for
mounting , EVER!
After this I drew up the design of the bottom of the robot.
 As you can see the IR sensor array is in front. Servos are on the side and the caster is on the back.
Before we begin assembling the mount for the line sensors , lets just
review how they work. In your QRB1113 sensor there are actually two
components, an IR emitter and a phototransistor. The IR emitter LED , as
its name implies , emits infrared light which is "invisible" to the
human eye. But, a cool trick with IR light is to use a camera, such as a
cell phone camera, to see the IR light.
The IR will appear to the camera bluish/ purpleish , while looking ( or
not looking) invisible to you. this is very useful when debugging IR
circuits   Anyway, lets get back on track. The IR LED emits infrared light and
the phototransistor will detect the amount of IR light being reflected
from the object. Since black objects reflect less light than white
objects, the difference can be detected and fed to the microcontroller.
Anyway, lets get back on track. The IR LED emits infrared light and
the phototransistor will detect the amount of IR light being reflected
from the object. Since black objects reflect less light than white
objects, the difference can be detected and fed to the microcontroller.
| 
